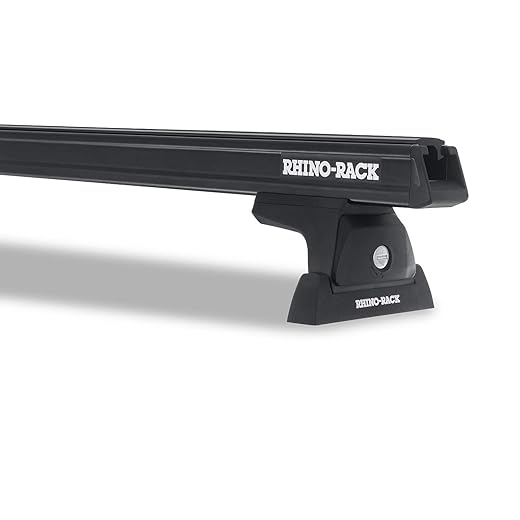
If you’re facing challenges with your Pro Series 63153 Roof Rack, you’re not alone, and we’re here to help. This step-by-step troubleshooting guide is designed with empathy for your frustrations, guiding you through common installation and performance issues you might encounter. From ensuring proper assembly to addressing stability concerns, each step is crafted to help you resolve problems effectively, so you can get back to enjoying your adventures with peace of mind. Your journey matters, and we want to make sure your roof rack enhances it rather than hinders it.
1. Check Compatibility
Verify the compatibility of the Pro Series 63153 Roof Rack with your vehicle model before proceeding with troubleshooting. Check the manufacturer’s guidelines provided in your vehicle’s owner manual or on the manufacturer’s website. Identify the make, model, and year of your vehicle and cross-reference this information with the roof rack specifications. Make a note of any specific requirements or restrictions outlined by the manufacturer, such as weight limits or installation constraints, to ensure a proper fit.
Assess the roof space of your vehicle to confirm that it can accommodate the dimensions of the Pro Series 63153 Roof Rack. Measure the available space across the roof, including the distance between existing mounting points. If your vehicle has a factory roof rack, examine whether the provided mounting hardware will align correctly with the roof rack components. Collect any additional tools or materials mentioned in the compatibility guidelines, and ensure that you have everything ready for a seamless installation.
2. Inspect Installation
Inspect the installation of the roof rack meticulously. Begin by closely examining each component; check that all parts, including crossbars and feet, are securely fastened. Confirm that there are no loose bolts or screws by attempting to wiggle or shift the components gently. Use the socket wrench to ensure that the mounting brackets are tightened according to the specific instructions provided in the installation manual. If necessary, refer to the torque specifications to maintain the integrity of the installation. This step is crucial, as even minor looseness can compromise the effectiveness and safety of the rack.
Identify any signs of misalignment in the roof rack setup. Look for discrepancies in the positioning of the crossbars when viewed from the front or rear of the vehicle. Ensure that they are parallel and evenly spaced on both sides. If misalignment is observed, adjust the mounting brackets accordingly to achieve a level and symmetrical installation. Check the distance between the roof of the vehicle and the lowest point of the rack to confirm proper clearance. Take care to examine the roof’s surface for any damage that might have been caused during installation, as this can indicate improper fitting and may need to be addressed before using the rack.
3. Evaluate Load Distribution
Check the weight distribution of the load on the roof rack by visually inspecting how items are arranged. Ensure that heavy items are placed in the center of the rack, as this will provide a balanced foundation. Consider using a level or measuring tape to verify that the load is not tilted or lopsided. If any items look unevenly placed, rearrange them immediately to achieve an even distribution. Keep in mind that shifting the weight too far to one side can lead to increased stress on the vehicle’s frame and suspension.
Secure all items tightly using straps or ties, ensuring they are fastened at multiple points. Monitor the tension of these fastenings regularly, as shifts during travel may alter the initial distribution. Adjust the load if necessary to maintain an equal weight distribution; this step is crucial for preventing instability while driving. As you prepare for travel, conduct a final inspection to confirm that everything is balanced and secure, keeping in mind that the safety and functionality of your roof rack depend on proper load management.
4. Look for Damage
Inspect the roof rack for any visible signs of damage, focusing on the crossbars and mounting points. Begin by visually examining each component for bends, cracks, or any unusual wear. Pay particular attention to the areas where the crossbars attach to the vehicle and where they connect to one another. Use your hands to gently apply pressure; a compromised part may flex or feel loose. Look for signs of rust or corrosion, as these could indicate potential weaknesses that could affect the roof rack’s stability.
Assess the overall alignment of the roof rack while ensuring all parts are securely fastened. Notice if there are any shifts or movements when you shake the crossbars gently. Check the hardware for missing or loose screws and bolts, as these can lead to improper support and safety issues when carrying loads. If you identify any damaged or loose components, take the time to replace or tighten them accordingly to maintain the roof rack’s performance and safety on the road.
5. Consult the Manual
Refer to the user manual for troubleshooting tips specific to the Pro Series 63153 Roof Rack. Locate the troubleshooting section within the manual, where you will find solutions for common issues that may arise during installation or use. Identify relevant problems such as noise during driving, difficulty attaching the rack, or stability concerns. Use the following steps to troubleshoot effectively:
- Review the section related to installation to ensure all components are secured correctly.
- Check for any loose bolts or connections, tightening them as necessary.
- Look for guidelines on proper load distribution; avoid exceeding weight limits.
- Investigate any adjustments recommended to minimize noise.
Access maintenance recommendations to extend the lifespan of the roof rack. Look for care instructions in the manual that highlight best practices. Implement these actions for optimal performance:
- Clean the roof rack regularly with mild soap and water to prevent corrosion.
- Inspect for any signs of wear or damage before each use, focusing on straps and brackets.
- Store the rack indoors or covered when not in use to protect it from harsh weather.
- Follow the manual’s suggested maintenance schedule for lubrication of moving parts.
Key Takeaways and Solutions
In conclusion, troubleshooting issues with the Pro Series 63153 Roof Rack can be manageable and straightforward when you follow the outlined steps. By prioritizing regular maintenance and ensuring proper installation, you can optimize the performance and longevity of your roof rack, allowing you to transport your gear safely and efficiently. With these best practices in mind, you can enjoy peace of mind during your travels.
Essential Equipment Needed
- Measuring tape
- Level
- Socket wrench set
- Screwdriver set
- Hex key set
- Safety glasses
- Gloves
- Torque wrench
- Cleaning cloth
- Lubricant (for metal parts)

Essential Solutions Unveiled
- Verify Installation: Ensure that the roof rack is properly installed according to the manufacturer’s instructions, checking all connections and fittings
- Inspect for Damage: Examine the roof rack for any signs of wear, damage, or corrosion that may affect its performance and safety
- Check Load Limits: Confirm that the weight and dimensions of the items loaded onto the roof rack do not exceed the specified load limits
- Tighten Bolts and Nuts: Regularly check and tighten all bolts and nuts to prevent loosening due to vibration during transit
- Review Attachment Points: Make sure that the roof rack is securely attached at all designated attachment points on your vehicle
- Utilize Padding: Ensure that any contact points between the roof rack and your vehicle’s roof are adequately padded to prevent scratching or denting
- Consider Aerodynamics: If you notice increased noise or decreased fuel efficiency, consider adjusting the rack to improve aerodynamics or remove it when not in use
- Test Stability: Gently shake or move the roof rack to check for any wobbling or instability, which could indicate an installation issue
- Clean Components: Regularly clean the roof rack to prevent buildup of dirt or debris that can affect its functionality
- Consult the Manual: Refer back to the Pro Series 63153 user manual for troubleshooting tips specific to your model and configuration
Step-by-Step Guide to Installing and Utilizing Your Pro Series 63153 Roof Rack
- Read the Manual: Before installation, carefully read the instruction manual to understand the components and the installation process. This will ensure you’re familiar with all parts and their functions
- Prepare Your Vehicle: Ensure your vehicle’s roof is clean and free of debris. This will help in securing the roof rack properly and avoid any scratches or damage
- Assemble the Roof Rack: Follow the assembly instructions provided in the manual. Make sure all parts are securely attached and any necessary tools are ready for use during the installation
- Securely Attach the Rack: Position the roof rack on your vehicle according to the instructions, ensuring it’s evenly placed and securely fastened. Double-check all clamps and bolts to prevent any movement during travel
- Load the Roof Rack Safely: When loading items onto the rack, distribute the weight evenly and ensure everything is securely fastened using straps or ties. This will maintain balance while driving and minimize the risk of items shifting or falling off
- By following these steps, you can effectively and safely use the Pro Series 63153 Roof Rack
Common Questions About the Pro Series 63153 Roof Rack
How does the aerodynamic design of the Pro Series 63153 Roof Rack affect fuel efficiency?
The aerodynamic design of the Pro Series 63153 Roof Rack is engineered to minimize wind resistance while driving. By incorporating features such as a streamlined shape and reduced drag, this roof rack helps to maintain a smoother airflow over the vehicle, which can significantly impact fuel efficiency.
When a roof rack has optimized aerodynamics, it reduces the turbulence that typically increases drag on the vehicle. As a result, the engine does not have to work as hard to overcome this resistance, leading to improved fuel economy. In practical terms, this means that vehicles fitted with the Pro Series 63153 Roof Rack can experience less fuel consumption compared to those with less aerodynamically designed racks. Overall, the thoughtful design of this roof rack contributes to better fuel efficiency during highway driving conditions.
Thanks for sharing! Compatibility can definitely be a hassle. It’s always a good idea to double-check with the manufacturer or see if other users have had success with the same vehicle.
That sounds like a good idea! Protective tape could help prolong the life of your roof rack. I’ve also seen some users paint their racks to cover minor scratches. Just make sure the paint is suitable for metal.
I had a rough experience with load distribution. I overloaded my rack once, and it was a disaster! Now I always follow the weight limits and spread out the load evenly. It makes a HUGE difference. Anyone else have tips for packing?
Wow, sounds like a lesson learned the hard way! Proper load distribution is crucial. Thanks for sharing your experience; it helps others avoid similar pitfalls.
I’ve noticed that checking compatibility can be a bit tricky! I have a 2018 Subaru Outback and found that some racks fit better than others. It’s worth researching specific models or even reaching out to the manufacturer for stories from other users. Anyone else had this experience?
Has anyone else faced issues with the Pro Series 63153 fitting on a different vehicle? I’m thinking of switching to a Toyota RAV4 and want to know if I need a whole new rack or if I can make it work.
Switching vehicles can definitely bring up compatibility questions. You might need different mounting hardware for the RAV4, but it’s worth checking with the manufacturer for advice on your specific situation!
I love my Pro Series 63153 Roof Rack! It’s been a game changer for road trips. I’ve loaded everything from kayaks to camping gear, and it’s held up beautifully. Just remember to double-check everything before you hit the road!
So glad to hear you’re having a positive experience! Road trips are way more fun with the right gear. Thanks for sharing your success story!
I just installed my Pro Series 63153 Roof Rack and I made a few tweaks to the installation steps. I used silicone sealant around the mounting points to prevent rust and added a rubber mat underneath the feet for more grip. I feel like it’s way sturdier now! Has anyone else tried this?
Great tip! Adding silicone sealant is a smart move to protect against rust. The rubber mat idea is also clever for extra stability. Thanks for sharing your adaptation!
I recently inspected my roof rack and found some scratches on the metal. I think it’s from the wind or tree branches while driving. I’m considering adding some protective tape. What do you all think?
Does anyone have recommendations for accessories that pair well with the Pro Series 63153? I’m looking for cargo bags or anything that can help me maximize my storage!
I recommend looking into cargo baskets or nets designed for your roof rack. They can really help secure loose items. Also, there are waterproof cargo bags specifically made for roof racks that might be useful for your trips!