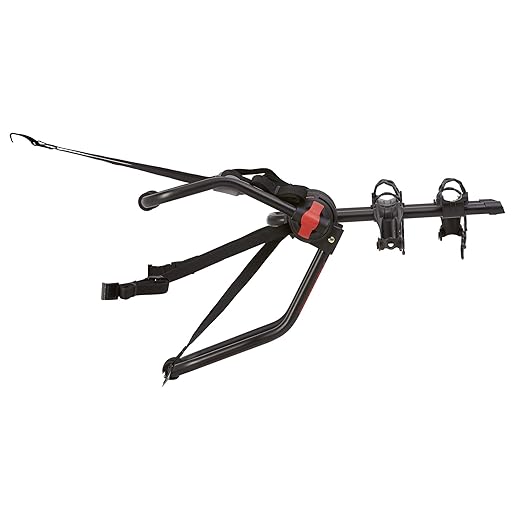
Loading your bikes onto the Yakima HangOut 2 Bike Rack can seem daunting, but with this step-by-step guide, you’ll find that it’s a straightforward and rewarding process. We understand that ensuring your bikes are secure while traveling is a priority for you, and that’s why this guide is designed to make it easy to achieve that peace of mind. From preparing your rack and adjusting the straps, to securely placing each bike in the correct position, each step is laid out clearly to help you navigate the process with confidence. By the end, you’ll be ready to hit the road with your bikes safe and sound, allowing you to focus on the adventures that await!


1. Prepare the Bike Rack
Ensure the Yakima HangOut 2 Bike Rack is mounted securely on your vehicle. Check that all straps are tightly fastened and that the rack is firmly attached, without any wobbling or movement. Inspect the connections at the base of the rack to confirm they are locked in place, as any looseness can lead to accidents during transit. For example, if you notice any slack in the straps, tighten them until they feel secure.
2. Adjust the Arms
- Extend the bike rack arms to their full height, ensuring they are adequately tall for your bikes.
- Adjust the arms to fit the size of your bikes, considering both frame size and wheel dimensions.
- Lock the arms securely in place, making sure they do not move during loading to prevent any accidents.
- Double-check the adjustments for stability before loading your bikes onto the rack.
3. Remove Accessories
- Remove water bottles from the bike cages.
- Detach any baskets or bags attached to the frame.
- Take off fenders or any additional accessories that may stick out.
- Store all removed items in a safe location to avoid misplacement.
- Check that no loose parts are left on the bike before transport.
4. Lift the First Bike
Position the first bike near the rack. Align the bike so that it is stable and easily accessible.
Lift the bike carefully, ensuring to:
- Support the frame firmly with one hand on the main tube and the other on the rear triangle.
- Avoid gripping the handlebars or seat, as this can compromise the bike’s integrity and lead to damage.
- Keep your back straight and use your legs to lift, maintaining balance and control.
Place the bike onto the rack securely, ensuring it is properly supported.
5. Place the First Bike on the Rack
Align the first bike with the rack by ensuring the front wheel is facing the designated area where the bike should rest. Position the frame so it is parallel to the rack, making it easier to slot the bike in place. Once the bike is correctly aligned, lift it and place it onto the rack, ensuring that the frame rests securely against the designated support. Check that the bike is stable, and confirm that the lower part of the frame is nestled in the rack’s support cradle, preventing any risk of it tipping over.
6. Secure the First Bike
- Position the first bike in the designated area of your transport system, ensuring it is upright and stable.
- Take the provided straps or cradles and wrap them around the bike securely.
- Adjust the straps so they hold the bike firmly in place, making sure they are snug.
- Avoid over-tightening the straps; check that they do not pinch or damage any components of the bike.
- Double-check the stability of the bike by giving it a gentle shake; it should remain firmly secured without any movement.
7. Lift the Second Bike
Lift the second bike by positioning yourself close to it. Bend your knees and maintain a strong grip on the frame. Raise the bike steadily, ensuring your back remains straight throughout the movement. Move deliberately and avoid twisting your torso while lifting to prevent any strain on your back.
8. Place and Secure the Second Bike
Position the second bike on the rack in a similar manner as the first bike, ensuring both are evenly spaced. Align the frame of the second bike with the frame of the first to maintain balance.
- Adjust the bike so that the front wheel faces outward and the back wheel is snug against the rack.
- Check that the handlebars of both bikes do not overlap, preventing any potential interference during transit.
Use the provided straps to secure the second bike firmly in place.
- Place one strap over the top tube and another under the seat, tightening them to eliminate any slack.
- Double-check the security by gently shaking the bikes; they should not move or shift.
Final Tips for Easy Loading
In conclusion, loading bikes onto the Yakima HangOut 2 Bike Rack can be an efficient and hassle-free experience when you adhere to the outlined steps. By preparing the rack correctly, securing your bikes with care, and confirming their stability, you can ensure a safe transportation of your bikes to your next adventure. With these practices in mind, I hope your biking journeys are as enjoyable and worry-free as possible.
Necessary Equipment
- Yakima HangOut 2 Bike Rack
- Two bicycles
- Ratchet straps or bungee cords (optional, for additional security)
- Soft cloth or towel (for cleaning, optional)
- Bike locks (optional, for securing bikes)
- Tool for adjusting bike rack (if applicable)
Loading Made Easy
- Check Compatibility: Ensure your bike rack is compatible with your vehicle and that it can accommodate the types of bikes you intend to carry
- Inspect the Rack: Before loading, examine the Yakima HangOut 2 for any signs of wear or damage, ensuring all components are secure and functioning properly
- Use the Right Orientation: Load your bikes onto the rack with the handlebars facing outward. This prevents them from interfering with each other during transport
- Secure All Components: Make sure to engage all straps and buckles securely to keep the bikes steady while driving. Double-check the tension before you hit the road
- Protect Your Bikes: Utilize anti-sway cradles and soft padding where possible to prevent bike-to-bike contact and to protect the finishes of your bikes
- Load Heavier Bikes First: If you have a combination of lightweight and heavier bikes, load the heavier bikes closest to the vehicle to improve stability
- Adjust for Size: If you are using bikes of varying sizes, adjust the cradles and straps accordingly for a secure fit
- Test the Setup: After loading, give the bikes a gentle shake to ensure they are secure before driving
- Follow Weight Limits: Adhere to the weight capacity outlined by Yakima for the HangOut 2 to ensure safe and efficient transport
- Route Planning: Plan your route, avoiding rough terrains or excessive bumps, which can jeopardize the stability of the bike rack and the bikes
Step-by-Step Guide to Installing and Utilizing Your Yakima HangOut 2 Bike Rack
- Prepare Your Vehicle: Ensure that your vehicle’s rear area is clean and free from any obstructions. Verify that the bike rack is compatible with your vehicle model
- Install the Rack: Follow the manufacturer’s instructions to securely attach the Yakima HangOut 2 Bike Rack to your vehicle’s trunk or hatch. Make sure it is tightly secured to avoid any movement during transit
- Adjust the Arms: Extend the bike support arms to the proper height so they can accommodate your bicycles. This ensures that your bikes are held securely and won’t swing during travel
- Load the Bikes: Place your bicycles onto the rack. Ensure each bike is properly positioned on the support arms, and use the provided straps to secure them tightly. Check that the bikes do not overlap or come into contact with each other
- Final Checks: Before driving, double-check that the rack and bikes are secure. Make sure that the rack is stable and that all straps are tightened to avoid any movement while on the road
- Following these steps will help ensure a safe and efficient experience using the Yakima HangOut 2 Bike Rack
Common Questions About the Yakima HangOut 2 Bike Rack
How does the price of the Yakima HangOut 2 compare to other bike racks on the market?
The Yakima HangOut 2 is priced competitively within the market for bike racks designed for trunk and hitch mounting. As of my last training data up to October 2023, the HangOut 2 typically retails around $200 to $250, depending on the retailer and any promotions they may offer.
When comparing it to other bike racks, I’ve found that similar trunk-mounted options can range from approximately $150 for entry-level models to upwards of $300 for higher-end brands. Hitch-mounted racks can start around $200 and can exceed $600 for premium models with additional features.
In terms of features, the HangOut 2 is well-regarded for its ease of installation and functionality, which may justify its price point compared to lower-priced alternatives that may lack durability or user-friendly features. Overall, the HangOut 2 presents a solid balance of quality and cost within the competitive landscape of bike racks.
What materials is the Yakima HangOut 2 Bike Rack made from?
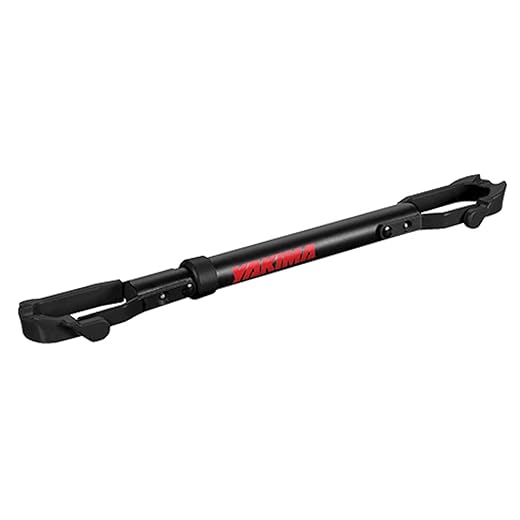
The Yakima HangOut 2 Bike Rack is primarily made from durable steel and features a powder-coated finish for added weather resistance. Additionally, it incorporates rubberized straps and padding to protect the bike frames during transport. This combination of materials ensures both strength and protection for the bikes being carried.
How easy is it to install and remove the Yakima HangOut 2 Bike Rack?
I find that the installation and removal of the Yakima HangOut 2 Bike Rack are both relatively straightforward processes. The bike rack is designed for easy setup, typically taking just a few minutes without the need for any additional tools. I appreciate that it features a simple strap system that secures the rack to the vehicle’s trunk or hatch.
When it comes to removal, it’s equally uncomplicated; I can simply detach the straps and lift the rack off. Overall, I would say that both tasks can be accomplished without much hassle, making it a convenient option for transporting bikes.
So, I adapted the ‘Remove Accessories’ step a bit. I usually just leave my water bottle holder on because it fits snugly and doesn’t get in the way when I load my bike. Just a personal quirk, but it saves me time! Anyone else do this?
That’s a great tip! It’s all about what works best for you, and if leaving the holder on saves time, go for it! Thanks for sharing your personal variation; it might help others streamline their process too.
Hey, great guide! I’d love to see a follow-up on maintenance tips for the Yakima racks. Like, how do you keep them from getting rusty or worn out over time? That info would be super useful!
Thanks for the suggestion! We’re glad you found the guide useful. Maintenance is definitely important, and we’ll look into creating a comprehensive guide on how to care for your Yakima racks to keep them in top shape.
I found the step about adjusting the arms super helpful, but I wonder if the rack fits different bike sizes. Can you guys give some tips on how to make it work for kids’ bikes or larger frames? It would be great to have some info on that!
Thanks for your comment! The Yakima HangOut 2 is pretty versatile, but for kids’ bikes, you might need to use a bike adapter. For larger frames, just make sure to adjust the arms accordingly and check the weight limit. We’ll consider adding a section on fitting different bike sizes in future updates!