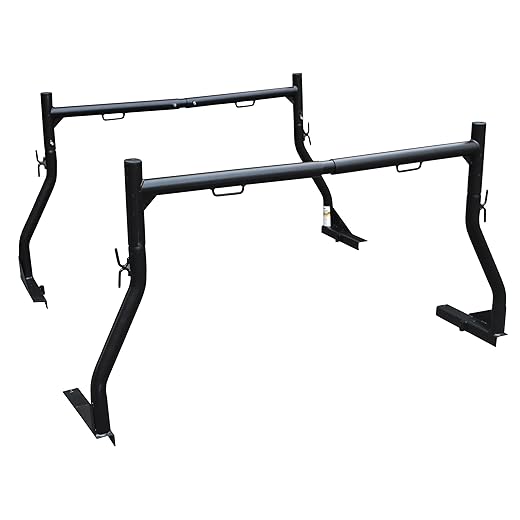
Get Ready to RACK & Roll!
Did you know that over 70% of adventurous souls don’t take full advantage of their truck’s potential? In this guide, I’m here to share the ultimate secrets of roof rack installation that’ll turn your truck into the ADVENTURE VEHICLE of your dreams! Let’s dive into the fun!
What You’ll Need Before We Begin
Gather the following goodies before we dive in:
- Roof rack (that fits my truck)
- Wrench set
- Screwdriver set
- Measuring tape
- Level
- Extra hands (my buddies love to help, right?)
- A bit of patience (it’s a must!)

Choosing Your Roof Rack: The Perfect Match!
Select your soulmate—uh, roof rack! Picking the right roof rack is crucial for your truck’s adventures. Think of it as dating for your vehicle; you need to find the one that complements your lifestyle!
Identify your goals. Are you hauling bikes, kayaks, or that inflatable unicorn for the beach? Different activities require different racks. For instance, a crossbar rack works wonders for bikes and cargo boxes, while a basket rack is perfect for those sprawling camping trips.
Check your truck’s compatibility. Make sure the rack fits your truck’s model and year; it’s the automotive version of “we just aren’t meant to be.” You don’t want to end up on a disastrous first date with a rack that doesn’t fit!
Weight capacity matters. Discover how much your truck can handle. Match your rack’s capacity with what you plan to carry—nobody wants a dramatic roof rack breakup on the highway!
Consider the material. Metal racks are sturdy, while plastic ones are lightweight. Choose wisely—think about your long-term relationship with this accessory!
So get out there, do your research, and find your perfect rack match!

Preparing Your Truck: It’s Time for a Clean Start
Get your cleaning supplies ready! Before you break out the fancy tools, grab some soapy water, a sponge, and a microfiber cloth. Trust me—dirty roofs and fancy racks do not mix!
Wash your truck’s roof. Scrub like it’s a Saturday morning chore, zooming in on those dusty spots and potential grime left over from your last adventure. A clean surface is crucial for a tight fit, so don’t skip this step! Think of it as setting a clean stage for your DIY performance.
Dry it off. Use that microfiber cloth to pat the roof dry. This isn’t just about looking pretty; any moisture left behind could mess with the installation. Not to mention, your neighbors might enjoy watching you wipe down your truck with the precision of a car detailer!
Inspect for imperfections. While you’re up there, check for rust or scratches. If you spot anything questionable, address it before you get all excited about your roof rack. Nobody wants to mount a rack on a questionable roof!
Now that your truck is shining and ready, you’re one step closer to roof rack glory!

Gathering Your Tools: Gear Up for Action!
Scavenge your garage! It’s tool time, my friend! Most of these essentials are probably lurking in the corners, waiting for you to come to their rescue. I promise, we’re not calling for a home improvement store heist just yet!
Grab these key players:
- Socket set: Get a socket wrench to make screwing things down smoother than butter on hot toast. A ratchet wrench needs to be on your team as well!
- Screwdrivers: Both flathead and Phillips types could be handy for various screws. Think of them as your multitasking buddy.
- Measuring tape: To ensure the rack aligns perfectly on your truck roof. It’s like measuring your recipe ingredients but way cooler.
- Level tool: Make sure your roof rack isn’t on a wonky tilt. Nobody wants their camping gear sliding off during the drive!
- Rubber mallet: For gently coaxing parts into place without causing a scene—no one likes a cranky roof rack.
Lastly, grab a buddy! While not a tool, a friend can hold things steady—plus, they might need to witness your masterpiece of roof rack installation! Now that you’re all geared up, it’s time to tackle the installation like a pro!

Installation Process: Step-by-Step Triumph!
Unbox your roof rack. Carefully remove your beautiful new roof rack from its packaging. Channel your inner child on Christmas morning—just be careful with those scissors!
Lay out all parts. Spread everything out like a celebratory banquet. Check the instruction manual and ensure you have all the required pieces. Missing parts? That’s a no-go, friend; just like Taco Tuesday without tacos!
Align the rack on your truck. Gently place the roof rack onto your truck’s roof, making sure it’s positioned correctly. Remember, this isn’t a game of Twister! Use your measuring tape to ensure it’s centered.
Secure the mounting hardware. Grab your socket set and start tightening those bolts! Use those muscles but go easy—over-tightening isn’t a power move. Think of it as a gentle hug for your rack.
Assemble any additional components. If your kit includes crossbars or spacers, attach them now, following the manual. This is like assembling a jigsaw puzzle; don’t force pieces together—they’ll fit perfectly if you do it right!
Tap it down with a rubber mallet. Ever seen someone softly coax a stubborn potato into place? That’s what you’ll do here—gently tap the corners of your rack to ensure everything sits snugly.
Give yourself a pat on the back—you’re making progress! Keep going; the finish line is right around the corner!
Final Check: Ensure Everything is in Place!
Inspect your handiwork. Now that your roof rack is perched up there like a crowned jewel, it’s time to play detective! Look around for anything odd. Is it wobbly? Does it make weird noises? If so, it might be time for some tweaks.
Tighten those bolts! Get back to your tools and make sure everything is snug. Use your socket wrench and give each bolt a nice pull. Think of it as doing a little tightening exercise—your roof rack will thank you!
Give it a shake test. Channel your inner toddler and give that rack a gentle shake. If it doesn’t move, you’re golden! If it feels like it’s ready to take flight, it’s time to revisit those bolts.
Check alignment. Look from different angles to ensure it’s sitting straight. No one wants a roof rack that’s more tilted than your cousin after three cups of holiday punch!
Don’t forget the straps! If you plan to haul luggage or gear, practice loading it up and strapping it down securely. Safety isn’t just a suggestion; it’s a must!
Once you’ve given everything the green light, you can officially hit the road!
You Did It! Rack On!
Congratulations! You’re now all set for your next big adventure with your newly installed roof rack! What epic journey will you embark on first—mountains or beaches?
This guide is decent, though I wish it included some troubleshooting tips. 😕 I almost broke something when I couldn’t find a way to attach the last bracket. Luckily, I figured it out, but a quick ‘what to do if…’ section would’ve saved my sanity!
Totally get you! I had a similar issue with some ambiguous steps. Just a quick tip: always double-check if you have the right measurements before starting.
Thanks for the feedback, Lisa! We’ll consider adding a troubleshooting section in the future.
Just finished installing my roof rack using this guide! 🚗 It was way easier than I thought. The step-by-step instructions were super clear, especially the part about preparing the truck. Honestly, I was worried I’d mess it up, but I even had a buddy help me out. Now I’m ready for a weekend road trip! 🌄
Awesome! Glad to hear it was straightforward! What rack did you end up choosing?
Great to hear, Mike! Make sure to share some pics of your adventure!
Road trip? Sounds epic! Where are you headed?
Not gonna lie, I was SO nervous to try this myself. But your guide gave me enough confidence. 🔨 I also added some extra safety straps for peace of mind. Next tip: maybe include a section on what to carry with it? Like can I throw a kayak up there? Or too heavy? Thanks!
I think kayaks are fine, just get the right pads for it. I had mine on a rack without them, and yeah, BIG mistake!
You can definitely carry a kayak, but just make sure to double-check the weight limit of your rack!
Good idea, Emma! Adding tips for what you can transport safely will definitely help.
Great guide but a little over the top with excitement? 😂 I mean, it’s just a roof rack, right? But I guess whatever keeps us motivated! Just finished mine, and I can’t wait to load it up. 10/10 would recommend checking it out unless you want to wing it like I did the first time!
I think the enthusiasm is part of the charm! But you’re right, just be careful out there—nothing like a flying kayak to ruin the day!
I think a little hype keeps the boring stuff fun! Keep that energy up, guide writers!
Haha, fair point, Jessie! Sometimes we get a bit too hyped! Glad it helped you!
Wow, I thought this was going to be a disaster, but it actually turned out great! 😄 I do have a question – about tightening the bolts. How tight is too tight? I don’t want to snap anything!
Yeah, I went a bit overboard and ended up needing a replacement part. Just a light snug works for me!
Usually, tightening until it feels secure is good! But you don’t want to crank it down excessively. A bit of torque is good, but stop before it feels like you’re forcing it.
How do you guys even know what to buy? So many racks out there! I actually went for the cheaper option, and I’m not really sure it’ll hold up. Any suggestions for a sturdy rack without breaking the bank? 🤔
I went with a mid-range one I found on sale! It’s been solid so far. You can still get quality without spending too much!
I hear you! If you’re worried about sturdiness, just check reviews online for user experiences!
Hey Albert! It’s all about matching the rack to your truck’s specs. Brands like Thule and Yakima are reliable without being super pricey.